

RISC-V for the STM32 hacker
RISC-V for the STM32 hacker
Cheap but powerful 32-bit microcontroller boards have been around for some time now and offer a great amount of peripherals. After starting to fiddle around with the cheap STM32-based blue pill boards, I felt no urge to ever get back to my old AVR based uCs.
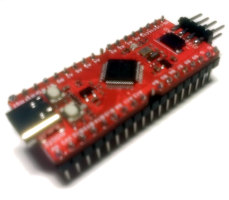
Having quite a bit of experience with STM32, I wanted to discover the wonderful world of the new RISC-V architecture. Luckily, with the Sipeed Logan Nano, there’s a readily build demo board available offering a GD32VF103 microprocessor. On the software side, we will base our code on a modified version of libopencm3, which is an “open source ARM Cortex-M microcontroller library”.
Wait what? I thought we were talking about RISC-V, not ARM here?! Yes: But only a small part of a microcontroller is the actual processor core (ARM or RISC-V or something). The most important part to the user is the collection of peripheral devices, such as GPIO ports, USART, I2C, SPI, timers etc. Thus, a similarly large part of libopencm3 consists of its hardware abstraction layer around these peripherals. Especially it has great support for the STM32 line of microcontrollers.
What?! Why now STM32 and not GD32?! Let’s consider three microcontrollers: The STM32F103 by ST, the GD32F103 by Gigadevice which claims to be a 100% compatible replacement (more like 98%) for the STM32F103, and the GD32VF103. The GD32F103 is (almost) binary compatible to the STM32F103 and thus will run with libopencm3 just fine. Now looking at the GD32F103’s and the GD32VF103’s datasheets, we find: Their peripherals and the memory map (i.e. the magic memory addresses used to control the peripherals) are identical. Nice, so apart from different processor cores, the GPIOs and UART should just work the same.
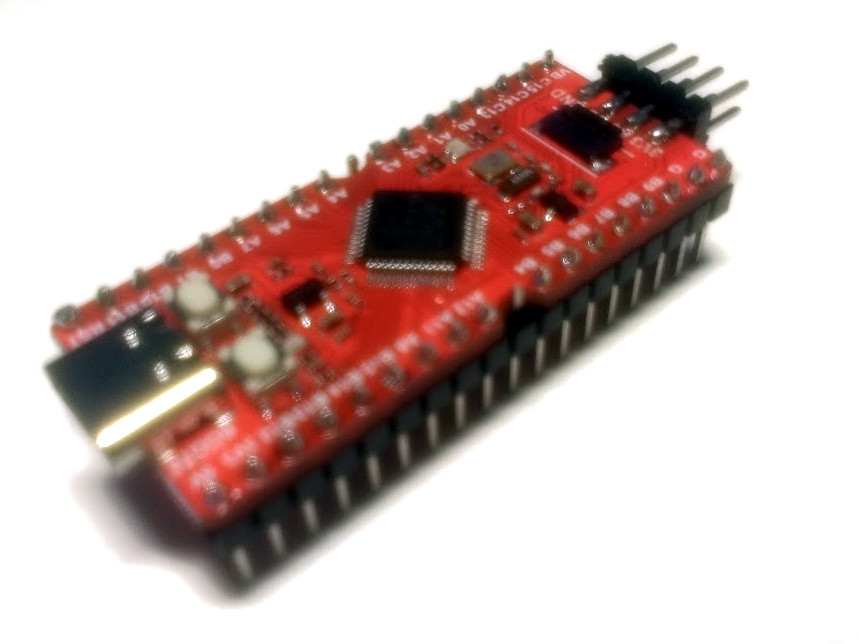
Hardware setup / Flashing
The board comes with a demo program flashing the user led in different colors. It can be put into flash mode by holding down the BOOT0 switch while triggering the RESET switch. You will notice that the LED stops flashing, and if attached by USB, you should see a new USB device ([28e9:0189]) appear.
We have two ways to flash the board:
- Slow, via serial / UART: Connect an USB/UART converter to PA9/PA10 and use e.g. the stm32flash tool as if you were talking to a STM32 chip.
- Fast, via USB / dfu-util: After the USB device has appeared, you can use dfu-util. (You might need to fix your permissions first, e.g. using the udev rule
SUBSYSTEMS=="usb", ATTRS{idVendor}=="28e9", ATTRS{idProduct}=="0189", GROUP="uucp", MODE="0666", followed byudevadm control --reload-rules.
Let’s try do download the demo program using dfu-util -U /tmp/firmware or stm32flash -b115200 -r /tmp/firmware /dev/ttyUSB0. This should produce a 64kb file.
Compiler toolchain
There seem to be different but same GCC-based RISC-V toolchains around. On arch linux, I am using riscv64-elf-{binutils,gcc,gdb,newlib}, which produces 32 bit binaries if told to (e.g. with -march=rv32imac -mabi=ilp32 -mcmodel=medany).
We could now analyze the demo firmware we read above using
riscv64-elf-objdump -D -b binary -m riscv /tmp/firmwareExample program
An example program can be found here (which builds upon Lukas’ previous work).
Building and flashing should be as easy as
 export PREFIX=risc64-elf-
 make
 make flash # if you are using dfu-util
 # stm32flash -w src/pill_serial.bin /dev/ttyUSB0 # if you want to flash over a serial adapter connected to PA9/10
This should cycle the LED’s colors and print 123123123123... on the UART1 at PA9/10.
Programming differences
Lots of programs that were written for the STM32F103 will Just Work™ on the GD32VF103, because the peripherals are identical. Differences include:
- Different clock speed
- Completely different interrupt controller (ECLIC vs NVIC)